The Newlywed's Kitchen Fiascos is moving!
Well, not moving exactly.
Actually, The Newlywed's Kitchen Fiascos isn't going anywhere. I am.
The purpose of this blog was for me to stay focussed on making a habit of cooking home cooked meals on a daily basis and experimenting with new recipes. Mission accomplished.
Now, I have decided to switch my blogging attention and am excitedly in the process of creating a natural lifestyle blog.
Beginning in August you can find me at leahharriss.blogspot.com
Hope to see you there!
Tuesday, July 22, 2014

Monday, July 14, 2014
Taco Bowls
Ready for an easy one dish wonder?!

1/4 cup kernel corn
1/4 cup diced tomatoes with green chilies
1/2 cup black beans
1/4 cup water
1/2 packet taco seasoning
shredded lettuce
corn tortilla chips
shredded cheese for topping (optional)
2. Add corn, tomatoes, beans and mix together. Pour in water and sprinkle seasoning all over pan. Stir to combine evenly. Let simmer for 5 minutes over low heat.
3. Dish into individual bowls on top of a bed of lettuce and top with cheese (optional). Forget the fork for this one, use your fingers and eat with chips!

You could easily top with sour cream or guacamole, if it suits your taste buds.

These measurements are the perfect quantity for two servings. With no leftovers, if you have a hungry husband.

Taco Bowls
Cooking Ingredients:
1/2 pound ground beef/venison/turkey1/4 cup kernel corn
1/4 cup diced tomatoes with green chilies
1/2 cup black beans
1/4 cup water
1/2 packet taco seasoning
shredded lettuce
corn tortilla chips
shredded cheese for topping (optional)
Cooking Directions:
1. Brown your meat and drain if necessary.2. Add corn, tomatoes, beans and mix together. Pour in water and sprinkle seasoning all over pan. Stir to combine evenly. Let simmer for 5 minutes over low heat.
3. Dish into individual bowls on top of a bed of lettuce and top with cheese (optional). Forget the fork for this one, use your fingers and eat with chips!
You could easily top with sour cream or guacamole, if it suits your taste buds.
These measurements are the perfect quantity for two servings. With no leftovers, if you have a hungry husband.
Monday, June 9, 2014
One Dish Chicken Dinner
Do you know those annoying posts on Pinterest that lead to nowhere? Yeah, they're very disappointing. But that's what inspired this post. A yummy looking picture which led the hubs to ask me to make it for supper. With not too much creativity I came up with a recipe that I thought would do the misleading post justice.


(The portions in this recipe are for two people.)
One Dish Chicken Dinner
Cooking Ingredients:
4 chicken tenders or 2 chicken breasts
1 small bag frozen cut green beans
2 russet potatoes cut into bite sized chunks
1 package Italian salad dressing mix
1/2 stick melted butter
Cooking Directions:
1. Place chicken down the middle of a greased glass baking dish. Pour beans on one side of the chicken and potatoes on the other side.
2. Mix Italian dressing and melted butter in a small dish, then pour over chicken, beans, and potatoes.
3. Bake in oven at 350° for one hour.
Too easy right? The chicken was perfectly juicy, the potatoes were just soft enough, and there was just enough butter in the bottom of the dish to soak our home made rolls in! Plus, only one dish to clean? That's my kind of supper.
Enjoy!
Thursday, May 22, 2014
Banana Muffins
I would like to start this post by thanking Sheri Neiman for nurturing my love for homemade bread by providing plenty of it whenever I came into her home during my babysitting years with her beautiful family. I have since decided that homemade bread will be a staple in my own home. With that being said, here's a simple recipe for muffins using freshly milled flour that I stumbled upon in my new adventure with making my own bread.

1 tsp salt
1 tsp baking soda
1 tsp baking powder
1 tsp cinnamon
1/4 tsp nutmeg
1 tsp vanilla
2-3 mashed bananas
1 cup buttermilk (or 1 cup regular milk + 1 tbsp vinegar)
1 egg
1/2 cup oil
1/2 cup honey
1/4 - 1/2 cup nuts (optional)
2. Spoon mixture into greased muffin tins. Bake at 400° for 20 minutes.
I only used two bananas which give a subtle banana flavor (the hubs doesn't like anything that isn't a banana to taste too much like a banana). These make for a great addition to a morning meal of bacon and eggs or are great as a quick breakfast on the go all by themselves.


By the way, anyone use Calphalon baking pans? I love my stove top pots and pans, but their baking pans always turn the bottom of muffins/cookies black.

So, thank you to Sheri for growing my love of homemade bread, and thank you to my sweet friend Abby (Becker) Page for hooking me up with everything I needed to get started at Bread Beckers! I look forward to plenty more fresh bread in my future (plus it makes the house smell delicious!).
UPDATE: I've made these now adding 1/8 cup of chopped almonds and they are perfect. Even better, add a handful of chocolate chips too for complete yummy goodness!
Banana Muffins
from the Bread Beckers Inc Recipe CollectionCooking Ingredients:
2 1/4 cups freshly milled flour (hard red)1 tsp salt
1 tsp baking soda
1 tsp baking powder
1 tsp cinnamon
1/4 tsp nutmeg
1 tsp vanilla
2-3 mashed bananas
1 cup buttermilk (or 1 cup regular milk + 1 tbsp vinegar)
1 egg
1/2 cup oil
1/2 cup honey
1/4 - 1/2 cup nuts (optional)
Cooking Directions:
1. Combine dry ingredients in a mixing bowl. Add in liquid ingredients and mix just until blended.2. Spoon mixture into greased muffin tins. Bake at 400° for 20 minutes.
I only used two bananas which give a subtle banana flavor (the hubs doesn't like anything that isn't a banana to taste too much like a banana). These make for a great addition to a morning meal of bacon and eggs or are great as a quick breakfast on the go all by themselves.
By the way, anyone use Calphalon baking pans? I love my stove top pots and pans, but their baking pans always turn the bottom of muffins/cookies black.
So, thank you to Sheri for growing my love of homemade bread, and thank you to my sweet friend Abby (Becker) Page for hooking me up with everything I needed to get started at Bread Beckers! I look forward to plenty more fresh bread in my future (plus it makes the house smell delicious!).
UPDATE: I've made these now adding 1/8 cup of chopped almonds and they are perfect. Even better, add a handful of chocolate chips too for complete yummy goodness!
Friday, May 9, 2014
Shepherd's Pie

How have I managed to go 25 years and have never eaten shepherd's pie? I wasn't even 100% certain what shepherd's pie was. So I did a little googling and Pinterest searching in an attempt to find the easiest recipe I could.
It's a simple, all in one meal that might just become one of the staples on our supper table.

The original recipe from Kraft can be found here.
Shepherd's Pie
Cooking Ingredients:
4 small potatoes2 tablespoons minced garlic
1 lb ground beef
2 tbsp flour
1 can whole kernel corn, drained
1 can small peas, drained
1 can sliced carrots, drained
1/2 cup beef broth
2 tbsp ketchup
pinch of shredded cheese
Cooking Directions:
1. Peel potatoes and cut into fourths. Cover with water and boil potatoes and garlic for 20 minutes or until tender.2. Brown ground beef. Add flour and cook over medium heat for 1 minute. Add vegetables, broth and ketchup and cook for 5 minutes. Spoon into 9 1/2 inch pie dish.
3. Mash potatoes. (I think I make my mashed potatoes differently every time I make them. This time I added in a few tablespoons of greek yogurt and butter). Spoon mashed potatoes on top of the pie dish.
4. Bake at 375 for 20 minutes. Sprinkle with shredded cheese and bake for another 5 minutes or until cheese is melted and golden.
5. Feed this to your man and he will be one happy camper.


Thursday, April 10, 2014
Organic Fudge Brownies… From a Box
The hardest part about going off processed foods? The simplicity of baking from a box.
While strolling the isles of my local Aldi picking up this week's groceries I came across a little unassuming box of brownie mix. No big deal right? I almost kept on walking until I noticed the little green leaf in the upper left hand corner that said: Organic.
My interest was peaked, naturally. How can you have "organic" brownies… from a box? So I pulled my buggy over and checked out the ingredients label. "Organic sugar, organic wheat flour, organic cocoa, cocoa powder, organic vanilla flavor, salt, baking powder (sodium acid, pyrophosphate, sodium bicarbonate, cornstarch, monocalcium phosphate)." Wow, I thought, I can pronounce everything on the label and I actually know what it is!

So, for $2.99 I grabbed myself a box and hurried home to try out my "Organic Fudge Brownie Mix".
Ladies and gentlemen, they taste delicious! And why should that be surprising? After all real food is delicious, way more so than stuffing yourself on a ton of chemicals and preservatives.
Consider this a public service announcement: get yourself to Aldi and buy a box of organic brownie mix. Your tastebuds can thank me later.

While strolling the isles of my local Aldi picking up this week's groceries I came across a little unassuming box of brownie mix. No big deal right? I almost kept on walking until I noticed the little green leaf in the upper left hand corner that said: Organic.
My interest was peaked, naturally. How can you have "organic" brownies… from a box? So I pulled my buggy over and checked out the ingredients label. "Organic sugar, organic wheat flour, organic cocoa, cocoa powder, organic vanilla flavor, salt, baking powder (sodium acid, pyrophosphate, sodium bicarbonate, cornstarch, monocalcium phosphate)." Wow, I thought, I can pronounce everything on the label and I actually know what it is!
So, for $2.99 I grabbed myself a box and hurried home to try out my "Organic Fudge Brownie Mix".
Ladies and gentlemen, they taste delicious! And why should that be surprising? After all real food is delicious, way more so than stuffing yourself on a ton of chemicals and preservatives.
Consider this a public service announcement: get yourself to Aldi and buy a box of organic brownie mix. Your tastebuds can thank me later.
Thursday, March 27, 2014
Pan Fried Tilapia
In the mood for fried fish, but don't want the hassle and grease of deep frying? I love the crunchy texture of fried food, but hate the greasy mess. My cooking life was changed for the better when I discovered pan frying. Way less oil, same great taste!

2 tbs soy sauce
1 tbs milk
1/4 cup bread crumbs
1 tbs cut oats (to add that crunchy texture, for a less healthy option try crushed corn flakes)
1 tsp seasoned salt (I prefer Tony's)
2 tbs olive oil
*(side note: when cooking one of my own creations I don't really measure things, which makes it hard to share the recipe with others - oops - so these measurements are approximations)*
2. Combine bread crumbs, oats, and seasoned salt in a plastic bag. One at a time, place fillets in the bag and shake to cover with the mixture.
3. Cook the fillets on the stove until golden brown on both sides (about 5 minutes each side, depending on how thick your fillets are).

P.S. For my asparagus recipe hop on over to The Pioneer Woman here. Super simple!
Pan Fried Tilapia
Cooking Ingredients:
2 tilapia fillets2 tbs soy sauce
1 tbs milk
1/4 cup bread crumbs
1 tbs cut oats (to add that crunchy texture, for a less healthy option try crushed corn flakes)
1 tsp seasoned salt (I prefer Tony's)
2 tbs olive oil
*(side note: when cooking one of my own creations I don't really measure things, which makes it hard to share the recipe with others - oops - so these measurements are approximations)*
Cooking Directions:
1. Heat olive oil in skillet over medium high heat. Marinate fillets in soy sauce and milk while oil is heating.2. Combine bread crumbs, oats, and seasoned salt in a plastic bag. One at a time, place fillets in the bag and shake to cover with the mixture.
3. Cook the fillets on the stove until golden brown on both sides (about 5 minutes each side, depending on how thick your fillets are).
P.S. For my asparagus recipe hop on over to The Pioneer Woman here. Super simple!
Wednesday, March 19, 2014
Tortilla Rollups
Here's a fun twist for mexican night: Tortilla Rollups. The original recipe is from The Weekend Gourmet and can be found here. Feel free to mix it up and add what you like, take out what you don't, and let me know how your version turns out!

1/2 can whole kernel corn
1/2 can black beans
1 cup shredded cheese (I used a mexican blend, but feel free to use your favorite)
1 cup plain greek yogurt
1/2 cup salsa
1tsp cumin
1/2 tsp salt
the juice from 1 lime
8-1o flour tortillas
olive oil
chili powder
2. Brown your ground beef (or cook and shred your chicken). Mix together with corn, beans, cheese, yogurt, salsa, cumin, salt, and lime juice.
3. Place 1/2 cup of the above mixture onto a tortilla and roll up. Place roll ups in a baking pan seam side down. Continue until you use up all of your mix.
4. Brush olive oil on your roll ups, then sprinkle with chili powder.
5. Bake in a 400 degree oven for 5 minutes. Flip, coat with olive oil and sprinkle with chili powder, then bake for another 5 minutes. (I added a little extra cheese to a couple when I pulled them out of the oven, because the hubs loves cheese).

These rollups are very simple and very delicious. Plus, they make great leftovers!
But, please, remember to spray your pan first! Otherwise, you will end up with pieces of rollups… like I did in one of my pans.

P.S. I've made these before with shredded chicken instead of ground beef (actually I use ground venison) and they are just as tasty. Enjoy!
Tortilla Rollups
Cooking Ingredients:
1lb ground beef or shredded chicken1/2 can whole kernel corn
1/2 can black beans
1 cup shredded cheese (I used a mexican blend, but feel free to use your favorite)
1 cup plain greek yogurt
1/2 cup salsa
1tsp cumin
1/2 tsp salt
the juice from 1 lime
8-1o flour tortillas
olive oil
chili powder
Cooking Directions:
1. Spray your baking pan with cooking spray (super important step that I forgot and you will see the disastrous result below!)2. Brown your ground beef (or cook and shred your chicken). Mix together with corn, beans, cheese, yogurt, salsa, cumin, salt, and lime juice.
3. Place 1/2 cup of the above mixture onto a tortilla and roll up. Place roll ups in a baking pan seam side down. Continue until you use up all of your mix.
4. Brush olive oil on your roll ups, then sprinkle with chili powder.
5. Bake in a 400 degree oven for 5 minutes. Flip, coat with olive oil and sprinkle with chili powder, then bake for another 5 minutes. (I added a little extra cheese to a couple when I pulled them out of the oven, because the hubs loves cheese).
These rollups are very simple and very delicious. Plus, they make great leftovers!
But, please, remember to spray your pan first! Otherwise, you will end up with pieces of rollups… like I did in one of my pans.
P.S. I've made these before with shredded chicken instead of ground beef (actually I use ground venison) and they are just as tasty. Enjoy!
Wednesday, March 12, 2014
Rotisserie Chicken Crockpot Style
Grab six dollars. Go to Aldi (my favorite grocery store of choice). Pick up a whole chicken and a pack of dry onion soup mix. Go home and put them both in the crock pot. Wait six hours. Devour.
You are welcome.

package dry onion soup mix
aluminum foil
2. Rinse the chicken, pat dry, and place in the crockpot on top of the aluminum foil.
3. Cover the chicken with the soup mix. Cook on high for six hours.

So inexpensive. So juicy. So easy.

You are welcome.
Crockpot Rotisserie Chicken
Cooking Ingredients:
small whole chickenpackage dry onion soup mix
aluminum foil
Cooking Directions:
1. Ball up five small balls of aluminum foil and place in the bottom of the crockpot.2. Rinse the chicken, pat dry, and place in the crockpot on top of the aluminum foil.
3. Cover the chicken with the soup mix. Cook on high for six hours.
So inexpensive. So juicy. So easy.
Again, you are welcome.
Tuesday, October 22, 2013
Meat and Potatoes

Cooking my way through The Pioneer Woman Cooks: Recipes from an Accidental Country Girl, and stumbled upon this delicious recipe for "Comfort Meatballs". In her cookbook, Ree explains she "came across these puppies when a fellow rancher wife brought them over shortly after she had her third child. Nursing mother, mother to be, or just a hungry guy or gal, these meatballs are sure to satisfy!"
Comfort Meatballs
Courtesy of Ree Drummond
Cooking Ingredients:
1 1/2 pounds ground beef
3/4 cup quick oats
3 tablespoons very finely minced onion
1 1/2 teaspoon salt
plenty of ground pepper
4 tablespoons canola oil
1/2 cup flour
1 cup ketchup
2 tablespoons sugar
3 tablespoons distilled white vinegar
2 tablespoons Worcestershire sauce
4 to 6 tablespoons minced onion
dash of tabasco (optional)
Note: I only used 1/2 pound ground beef and cut the remainder of the recipe in half to feed the hubs and myself.
Cooking Directions:
2. Roll the mixture into tablespoon sized meatballs and place on a cookie sheet. Place in the freezer for about ten minutes to firm.
3. After removing from the freezer, dredge each meatball in flour. Brown the meatballs in oil over medium heat, just until brown on either side, then place in a glass baking dish.
4. In a small bowl mix together remaining ingredients and pour over meatballs.
5. Bake at 350 degrees for 45 minutes.


Totally delicious! Serve these alongside mashed potatoes and green beans and your supper is served.
Sunday, July 21, 2013
Grilled Tilapia w/Veggie Pasta
Yay for experimenting with food besides chicken! The hubs loves seafood. Me, not so much. In an effort to expand my cooking skills and creativity while pleasing the hubs' palate, I have come to like appreciate tilapia. Recently, I've tried to incorporate it into our meals at least once a week.
Tilapia is a white fish and doesn't have a strong "fishy" taste. That means I don't have to cover its natural taste with a bunch of seasoning. Instead I try to enhance the natural flavor with only a pinch of seasoning.
This week's experiment involved a favorite of mine: pasta! Basically, I just took a bunch of things I found on hand in the kitchen and threw them together hoping for the best. It turned out pretty well, thankfully.
Unfortunately, I don't do a lot of measuring when I'm making up my own recipes so the following measurements are approximate guesses for two servings.
Grilled Tilapia w/Veggie Pasta
Cooking Ingredients:
2 fresh tilapia filets
1/4 cup soy sauce
1 teaspoon seasoned salt (I prefer Tony's)
2 servings angel hair pasta
1 tablespoon butter
1 tablespoon sour cream
1/4 cup milk
1/4 cup grated parmesan cheese
1/4 cup shredded mozzarella cheese
2 cups frozen vegetables (I prefer a California medley - carrots, brocoli, and cauliflower)
Cooking Directions:
1. Marinate tilapia fillets in soy sauce and seasoned salt for at least 10 minutes. Grill until no longer pink (I love using my George Forman grill, only takes about 4 minutes!).
2. Boil pasta according to package directions. Drain and set aside.
3. Melt butter and sour cream in a medium skillet over medium low heat. Pour in milk and combine until boiling. Add in cheese and stir to melt. Mix in pasta.
4. Microwave vegetables and a tablespoon of water in a glass bowl on high for 5 minutes. Drain and stir into pasta and sauce.

This meal was easy and quick. Two things I love for my recipes to be! There was just enough flavor and variety, plus there was a little pasta left over for lunch the next day, which is always a plus in my book. Try it out and let me know what you think!

Tilapia is a white fish and doesn't have a strong "fishy" taste. That means I don't have to cover its natural taste with a bunch of seasoning. Instead I try to enhance the natural flavor with only a pinch of seasoning.
This week's experiment involved a favorite of mine: pasta! Basically, I just took a bunch of things I found on hand in the kitchen and threw them together hoping for the best. It turned out pretty well, thankfully.
Unfortunately, I don't do a lot of measuring when I'm making up my own recipes so the following measurements are approximate guesses for two servings.
Grilled Tilapia w/Veggie Pasta
Cooking Ingredients:
2 fresh tilapia filets
1/4 cup soy sauce
1 teaspoon seasoned salt (I prefer Tony's)
2 servings angel hair pasta
1 tablespoon butter
1 tablespoon sour cream
1/4 cup milk
1/4 cup grated parmesan cheese
1/4 cup shredded mozzarella cheese
2 cups frozen vegetables (I prefer a California medley - carrots, brocoli, and cauliflower)
Cooking Directions:
1. Marinate tilapia fillets in soy sauce and seasoned salt for at least 10 minutes. Grill until no longer pink (I love using my George Forman grill, only takes about 4 minutes!).
2. Boil pasta according to package directions. Drain and set aside.
3. Melt butter and sour cream in a medium skillet over medium low heat. Pour in milk and combine until boiling. Add in cheese and stir to melt. Mix in pasta.
4. Microwave vegetables and a tablespoon of water in a glass bowl on high for 5 minutes. Drain and stir into pasta and sauce.

This meal was easy and quick. Two things I love for my recipes to be! There was just enough flavor and variety, plus there was a little pasta left over for lunch the next day, which is always a plus in my book. Try it out and let me know what you think!

Thursday, July 18, 2013
Pioneer Woman Macaroni & Cheese
Hello comfort food! Who doesn't love good ol' homemade mac and cheese?! I know this girl could live on it for days. And I'm not talking about the blue box stuff, I mean the good, gooey, made from scratch kind.
Ree Drummond, aka The Pioneer Woman, has the perfect recipe to get the job done (visit her site for a fantastic picture step by step).
Macaroni & Cheese
(Courtesy of the Pioneer Woman)
Cooking Ingredients:
4 cups dried macaroni
1 egg
4 tablespoons butter
1/4 cup all purpose flour
2 1/2 cups milk
2 teaspoons dry mustard
1 pound grated cheese
1/2 teaspoon salt
1/2 teaspoon pepper
1/2 teaspoon seasoned salt
Cooking Directions:
1. Cook macaroni al dente.
2. Beat egg in a small bowl. Melt butter in a large pot and sprinkle with flour, whisking together over medium-low heat for 5 minutes. Keep whisking continuously to avoid burning.
3. Stir 1/4 butter mixture into egg, whisking to avoid cooking the egg. Add egg mixture into large pot. Stir until smooth.
4. Add in cheese, stir to melt. Add seasonings.
5. Pour in drained macaroni and stir all together. Pour into a large casserole dish and top with remaining cheese. Bake at 350 degrees for about 20 minutes, until cheese is bubbly and browning.
I made this for our family 4th of July cook out and it was a major hit! Greedily I was able to bring home just enough left overs for dinner the next night, and the hubs and I made a meal of it!
Ree Drummond, aka The Pioneer Woman, has the perfect recipe to get the job done (visit her site for a fantastic picture step by step).
Macaroni & Cheese
(Courtesy of the Pioneer Woman)
Cooking Ingredients:
4 cups dried macaroni
1 egg
4 tablespoons butter
1/4 cup all purpose flour
2 1/2 cups milk
2 teaspoons dry mustard
1 pound grated cheese
1/2 teaspoon salt
1/2 teaspoon pepper
1/2 teaspoon seasoned salt
Cooking Directions:
1. Cook macaroni al dente.
2. Beat egg in a small bowl. Melt butter in a large pot and sprinkle with flour, whisking together over medium-low heat for 5 minutes. Keep whisking continuously to avoid burning.
3. Stir 1/4 butter mixture into egg, whisking to avoid cooking the egg. Add egg mixture into large pot. Stir until smooth.
4. Add in cheese, stir to melt. Add seasonings.
5. Pour in drained macaroni and stir all together. Pour into a large casserole dish and top with remaining cheese. Bake at 350 degrees for about 20 minutes, until cheese is bubbly and browning.
I made this for our family 4th of July cook out and it was a major hit! Greedily I was able to bring home just enough left overs for dinner the next night, and the hubs and I made a meal of it!
Thursday, July 11, 2013
Kitchen Upgrade

It's hard to believe that the hubs and I have owned our home for coming up on four years. And for the past, oh, let's say three years, we've both wanted to upgrade the kitchen by adding a backsplash. It's hard to fry chicken without a little bit of oil popping out of the pan and landing on the wall behind the stove. Needless to say, the wall space below the cabinets is a bit difficult to keep clean and pretty when it's only painted.
Two months ago while I was in Texas for a friend's wedding, the hubs decided it was time to stop talking and start doing. So all on his own he went to the tile store and picked out and purchased a box of tiles for the kitchen backsplash. (He got lucky, I actually liked his selection). However, that's as far as the project went. That box of tiles sat on the kitchen counter all by their lonesome until July 4th weekend.
I was quite tired of staring at that box of tiles and tired of debating wether we should install them ourselves or have a professional do it. Enter the rain. See, we've had an unusually wet summer down here in Georgia and the week of July 4th was no exception. Rain. every. day. So the hubs and I made a deal, since it was too wet outside for us to do anything fun we would tackle a house project. He had a four day weekend and we had a kitchen to conquer.
Four trips to the tile store, three rounds at two different Home Depots, and six days later we have a freshly upgraded kitchen with a lovely slate tile backsplash! And I'm quite proud to say that we did it all ourselves. Turns out the hubs and I make a pretty decent DIY team (thanks to the assistance of some YouTube videos).
I am beyond thrilled to have this job finished. The kitchen, my favorite room in the house and where I spend about 90% of my waking hours at home, has a whole new feel to it. It just leaves me asking one question: why on earth did we wait so long?!
Here's the before shot. Nice enough, but nothing special.

It took us two days to get the tile on the wall (we didn't start until after 4pm the first day). Then it had to set for 24 hours before we could apply the grout.

There were so many tiny cuts to make around the windowsill and seven outlets and light switches.

The Hubs was a pro at using the wet saw by the time we were finished! Just look at those perfect cuts.

Once the grout was applied we had to wait another 48 hours before applying the sealant.

Once the sealant was applied it was just a short 12 hours before the whole project was finished.
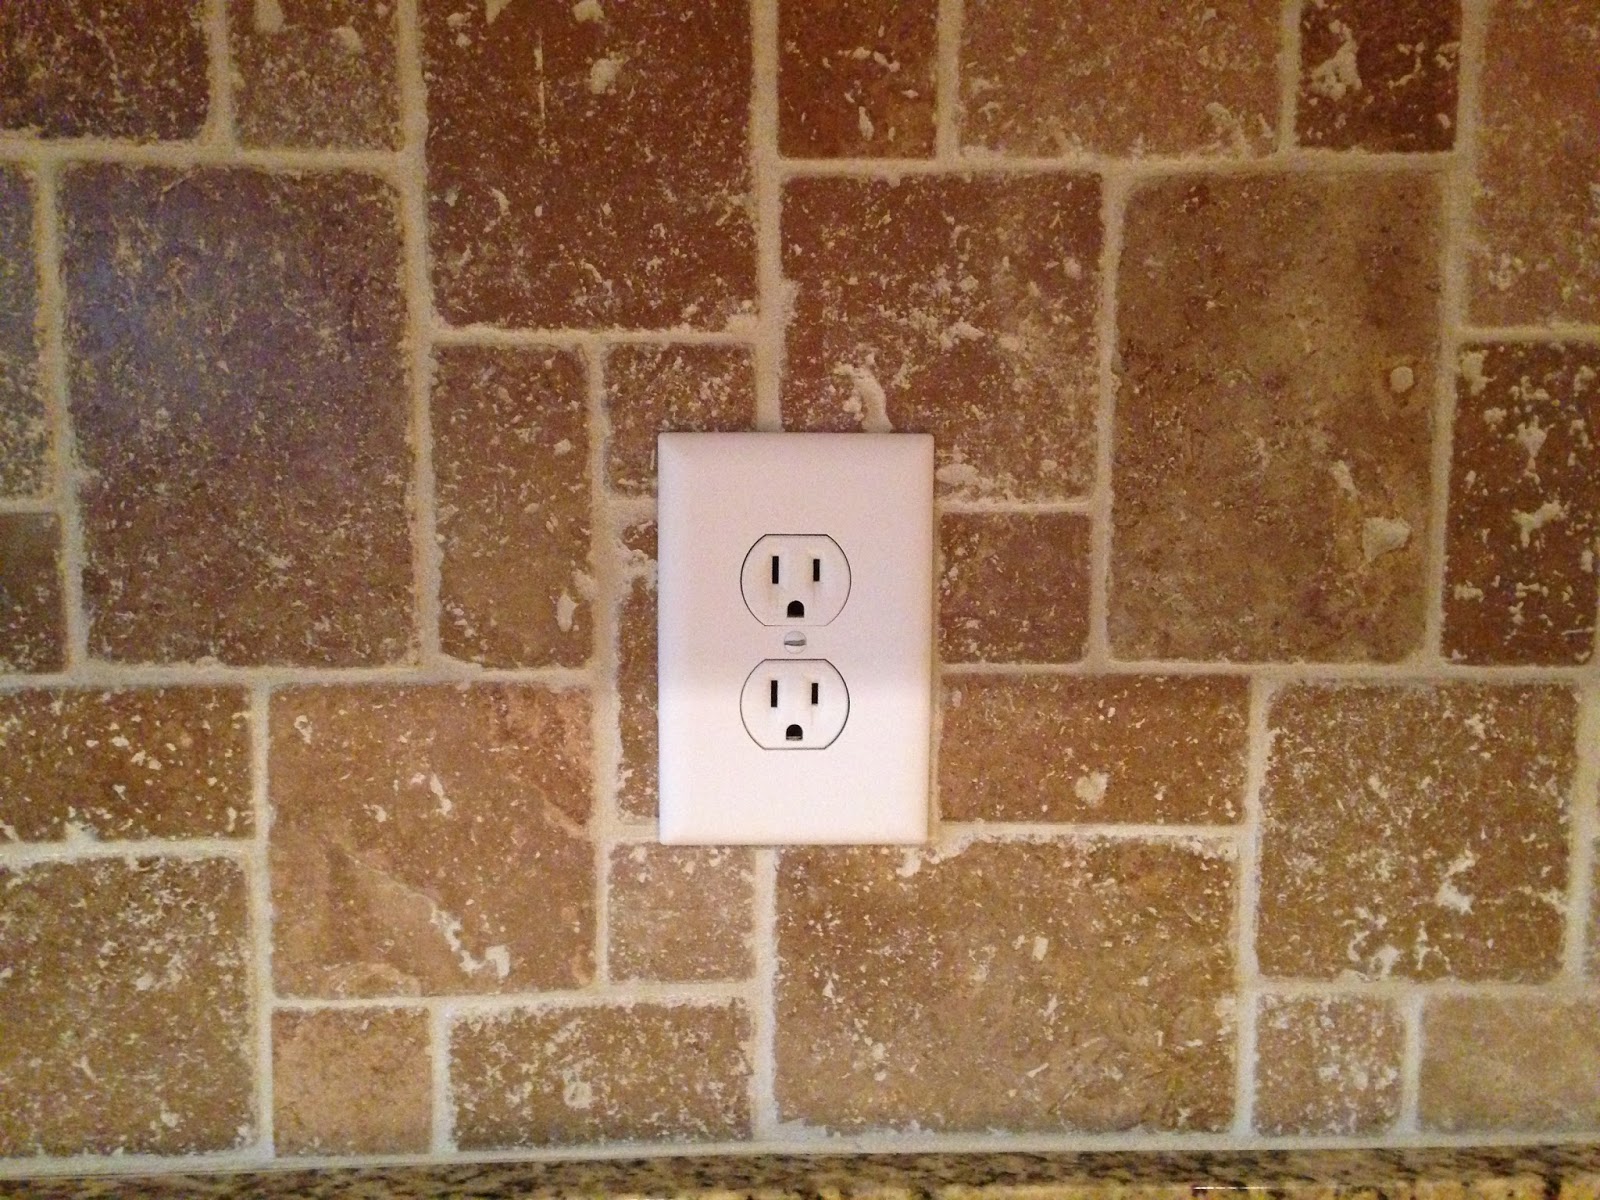
So happy with how it turned out!


Saturday, July 6, 2013
Whole Wheat Pancakes (For 2!)
I'm back!
I've been away from the blog for a while because life, well, was life, and things more important took priority over my recipes. But now that things have settled back to normal I'm excited to start mixing things up again.
To start things off I found this delicious pancake recipe on Pinterest. I made them Fourth of July morning (since the Hubs was actually home to eat breakfast with me!) and we gobbled them up before the butter could melt.
I'm trying to cut processed foods out of my cooking as much as possible and I've fallen back in love with anything whole wheat (I've already made whole wheat chocolate chip cookies and banana bread!). So naturally when I came across whole wheat pancakes I was in! Here's the recipe from Pinch of Yum.
Whole Wheat Pancakes
Ingredients:
1 egg
2 tablespoons brown sugar
2 tablespoons canola oil
1 teaspoon vanilla extract
3/4 cups buttermilk
1 cup whole wheat flour
1 tablespoon baking powder (I didn't have any on hand so I substituted 1 teaspoon baking soda)
1/2 teaspoon salt
2 tablespoons water
Cooking Directions:
1. Whisk together egg and brown sugar until smooth. Add in the oil, vanilla and buttermilk and whisk for another 15 seconds until combined.
2. Add in the flour, baking powder, and salt and stir just until combined. Add in the water until your batter is slightly runny.
3. Depending on the size you want your pancakes to be, pour approximately 1/4 cup of batter onto a hot griddle/pan over medium to low heat. Let sit until the edges are firm to the touch, then flip until each side is a nice golden brown.
4. Remove from pan, top with butter (and maybe a little maple syrup) and enjoy!

I've been away from the blog for a while because life, well, was life, and things more important took priority over my recipes. But now that things have settled back to normal I'm excited to start mixing things up again.
To start things off I found this delicious pancake recipe on Pinterest. I made them Fourth of July morning (since the Hubs was actually home to eat breakfast with me!) and we gobbled them up before the butter could melt.
I'm trying to cut processed foods out of my cooking as much as possible and I've fallen back in love with anything whole wheat (I've already made whole wheat chocolate chip cookies and banana bread!). So naturally when I came across whole wheat pancakes I was in! Here's the recipe from Pinch of Yum.
Whole Wheat Pancakes
Ingredients:
1 egg
2 tablespoons brown sugar
2 tablespoons canola oil
1 teaspoon vanilla extract
3/4 cups buttermilk
1 cup whole wheat flour
1 tablespoon baking powder (I didn't have any on hand so I substituted 1 teaspoon baking soda)
1/2 teaspoon salt
2 tablespoons water
Cooking Directions:
1. Whisk together egg and brown sugar until smooth. Add in the oil, vanilla and buttermilk and whisk for another 15 seconds until combined.
2. Add in the flour, baking powder, and salt and stir just until combined. Add in the water until your batter is slightly runny.
3. Depending on the size you want your pancakes to be, pour approximately 1/4 cup of batter onto a hot griddle/pan over medium to low heat. Let sit until the edges are firm to the touch, then flip until each side is a nice golden brown.
4. Remove from pan, top with butter (and maybe a little maple syrup) and enjoy!

(Photo Credit: Pinch of Yum)
Monday, July 30, 2012
Buffalo Chicken Quesadilla
Working 40 hours a week in retail, you don't always have the time or opportunity to cook a full meal. Enter the quesadilla. Great for a quick throw together lunch or supper.
Ingredients (for 2 quesadillas):
4 flour fajita shells
1 can chunk chicken breast
3 tablespoons Texas Pete buffalo sauce (or your favorite buffalo sauce)
1 cup shredded cheese (or if you don't have any on hand just use 4 slices of american singles)
Cooking Directions:
1. Heat a small pan on medium high heat. While the pan is heating up, mix together the chicken and buffalo sauce in a small bowl.
2. Place one fajita shell in center of pan. Cover shell in cheese. Add half of chicken. Add a little more cheese and top with another shell.
3. Brown both sides of quesadilla until cheese is melted on the inside. Remove from heat and cut into halves (or quarters if you prefer).
There you have it! Just add a side salad and some chips and salsa and you have dinner in a bout 5 minutes that includes protein, dairy, bread, and vegetables. Not too shabby (and cheap too!).
Ingredients (for 2 quesadillas):
4 flour fajita shells
1 can chunk chicken breast
3 tablespoons Texas Pete buffalo sauce (or your favorite buffalo sauce)
1 cup shredded cheese (or if you don't have any on hand just use 4 slices of american singles)
Cooking Directions:
1. Heat a small pan on medium high heat. While the pan is heating up, mix together the chicken and buffalo sauce in a small bowl.
2. Place one fajita shell in center of pan. Cover shell in cheese. Add half of chicken. Add a little more cheese and top with another shell.
3. Brown both sides of quesadilla until cheese is melted on the inside. Remove from heat and cut into halves (or quarters if you prefer).
There you have it! Just add a side salad and some chips and salsa and you have dinner in a bout 5 minutes that includes protein, dairy, bread, and vegetables. Not too shabby (and cheap too!).
Friday, March 30, 2012
Crispy Italian Chicken and Pasta
A thousand apologies that I haven't posted in ages!! I've started a new job that has me working more than ever before and I've allowed it to be my excuse from getting on the computer as often as I used to. But alas, I am back and with the absolute best pan fried chicken that I have ever made, or even tasted.
The following is a Pinterest recipe that I have been wanting to try for months, but just hadn't gotten around to it. So when planning out my meals for the week I was determined that this one was finally going to make the list. And I'm so glad that it did!
(Just as a side note: I cut the entire recipe in half and it was the perfect portion for the hubs and me)
Crispy Chicken with Creamy Italian Sauce and Bowtie Pasta
(thanks to Jamie Cooks It Up!)
Cooking Ingredients:
3 large chicken breasts
5 cups cornflakes (if you don't typically eat cornflake cereal and don't feel like buying an entire box just for this recipe - I sure didn't! - then just get the single serve breakfast bowls of cereal that they have for like $1. 1 serving was plenty for the hubs and my chicken)
3/4 cup flour
1/2 tablespoon salt
1/2 cup milk
6 tablespoons olive oil
12 oz bowtie pasta
10 oz Philadelphia Cooking Cream (Italian Cheese and Herb)
2 cans Cream of Chicken soup
1 cup chicken broth
1/2 cup milk
Cooking Directions:
1. Start by boiling a large pot of water for your pasta. Let the pasta cook while you prepare and cook the chicken. Place the chicken in a ziplock bag and use a meat mallet to pound the chicken flat. Then cut eat chicken breast in half.
2. Crush the cornflakes, either in a food processor or like i did - on a plate and I crushed them with my hands (you gotta have a little fun while you're cooking and the best way to do that is by getting messy!). Mix together the salt and flour in a pan. Dredge the chicken in the flour, making sure each piece is thoroughly coated. Place the chicken in the freezer for about 5 minutes (I had never done this before when coating my chicken, but it's genius! it helps the flour stick to the chicken and prevent it from caking off in the next step).
3. Dredge the chicken in the 1/2 cup milk. In another pan (or plate) dredge the chicken in the crushed corn flakes, again making sure each piece is thoroughly coated.
4. Add the oil to a hot skillet. Place each chicken breast in the skillet and sprinkle with a little salt and pepper. Cook on either side for about 5 minutes or until either side is golden brown. Then reduce to medium heat and cover, allowing the chicken to cook for about another 5 minutes.
5. By this time the pasta should be ready to drain. Once the chicken is cooked, remove it from the skillet and place on a plate. Using the same skillet, whisk together the Philadelphia Cream, Cream of Chicken soup, chicken broth, and milk over medium heat for a few minutes until sauce is formed.
6. Lastly you can either cut the chicken into strips and place on top of the pasta and sauce, or you can serve it on the plate alongside your pasta.

This may sound like a lot of work, but it really wasn't too bad and I think it only took me a bout 30 minutes and we were ready to eat. And I am not lying when I say this is the best pan fried chicken that I have ever tasted. It was seriously amazing. I couldn't get enough, I had to go back for seconds (aka eat some of the hubs!). I think that it is the cornflakes. They add great texture and a little bit of sweetness. Either way, this is definitely the only way I'm making pan fried chicken from here on out.
Enjoy!
The following is a Pinterest recipe that I have been wanting to try for months, but just hadn't gotten around to it. So when planning out my meals for the week I was determined that this one was finally going to make the list. And I'm so glad that it did!
(Just as a side note: I cut the entire recipe in half and it was the perfect portion for the hubs and me)
Crispy Chicken with Creamy Italian Sauce and Bowtie Pasta
(thanks to Jamie Cooks It Up!)
Cooking Ingredients:
3 large chicken breasts
5 cups cornflakes (if you don't typically eat cornflake cereal and don't feel like buying an entire box just for this recipe - I sure didn't! - then just get the single serve breakfast bowls of cereal that they have for like $1. 1 serving was plenty for the hubs and my chicken)
3/4 cup flour
1/2 tablespoon salt
1/2 cup milk
6 tablespoons olive oil
12 oz bowtie pasta
10 oz Philadelphia Cooking Cream (Italian Cheese and Herb)
2 cans Cream of Chicken soup
1 cup chicken broth
1/2 cup milk
Cooking Directions:
1. Start by boiling a large pot of water for your pasta. Let the pasta cook while you prepare and cook the chicken. Place the chicken in a ziplock bag and use a meat mallet to pound the chicken flat. Then cut eat chicken breast in half.
2. Crush the cornflakes, either in a food processor or like i did - on a plate and I crushed them with my hands (you gotta have a little fun while you're cooking and the best way to do that is by getting messy!). Mix together the salt and flour in a pan. Dredge the chicken in the flour, making sure each piece is thoroughly coated. Place the chicken in the freezer for about 5 minutes (I had never done this before when coating my chicken, but it's genius! it helps the flour stick to the chicken and prevent it from caking off in the next step).
3. Dredge the chicken in the 1/2 cup milk. In another pan (or plate) dredge the chicken in the crushed corn flakes, again making sure each piece is thoroughly coated.
4. Add the oil to a hot skillet. Place each chicken breast in the skillet and sprinkle with a little salt and pepper. Cook on either side for about 5 minutes or until either side is golden brown. Then reduce to medium heat and cover, allowing the chicken to cook for about another 5 minutes.
5. By this time the pasta should be ready to drain. Once the chicken is cooked, remove it from the skillet and place on a plate. Using the same skillet, whisk together the Philadelphia Cream, Cream of Chicken soup, chicken broth, and milk over medium heat for a few minutes until sauce is formed.
6. Lastly you can either cut the chicken into strips and place on top of the pasta and sauce, or you can serve it on the plate alongside your pasta.

(photo curtesy of: Jamie Cooks It Up!)
This may sound like a lot of work, but it really wasn't too bad and I think it only took me a bout 30 minutes and we were ready to eat. And I am not lying when I say this is the best pan fried chicken that I have ever tasted. It was seriously amazing. I couldn't get enough, I had to go back for seconds (aka eat some of the hubs!). I think that it is the cornflakes. They add great texture and a little bit of sweetness. Either way, this is definitely the only way I'm making pan fried chicken from here on out.
Enjoy!
Monday, March 5, 2012
Creamy Taco Pasta
Let me first just say, I would loose my head if it wasn't attached. Seriously! I got a much needed new pan for Christmas that I was SO excited about... and then left it in Georgia! For the past two months, every time I've cooked something all I could think about was how much easier it would be if I had that darn pan. So on a quick weekend treck up to the home state I made sure that I came back to the swamp with my pan. And the other night I finally got to break it in.
I was about to prepare supper for the night with a recipe for a taco pasta I had found on Pinterest and realized that I had already tried it. And while it was good, it was lacking a little something. Not wanting to make the same mistake again I started searching for similar dishes with the ingredients I had on hand. And what I came up with was a little conglomeration of all the different ones I read.
Creamy Taco Pasta
Cooking Ingredients:
1 pound ground beef
2 cups uncooked pasta (I used Rotini but any small pasta will work)
1 packet taco seasoning
1 tablespoon sour cream
1 tablespoon cream cheese
1/4 cup salsa
1/4 cup heavy cream
finely shredded cheddar cheese
Cooking Directions:
1. Brown meat in a large skillet while cooking pasta according to package directions.
2. Add taco seasoning to meat (if you like it a little 'saucier' add 1/4 cup of water too). Add in cream cheese, sour cream and salsa. Allow the cream cheese to melt and stir all ingredients together.
3. Drain pasta and add to meat. Stir in 1/4 cup cream.
4. Serve topped with cheese.

I was about to prepare supper for the night with a recipe for a taco pasta I had found on Pinterest and realized that I had already tried it. And while it was good, it was lacking a little something. Not wanting to make the same mistake again I started searching for similar dishes with the ingredients I had on hand. And what I came up with was a little conglomeration of all the different ones I read.
Creamy Taco Pasta
Cooking Ingredients:
1 pound ground beef
2 cups uncooked pasta (I used Rotini but any small pasta will work)
1 packet taco seasoning
1 tablespoon sour cream
1 tablespoon cream cheese
1/4 cup salsa
1/4 cup heavy cream
finely shredded cheddar cheese
Cooking Directions:
1. Brown meat in a large skillet while cooking pasta according to package directions.
2. Add taco seasoning to meat (if you like it a little 'saucier' add 1/4 cup of water too). Add in cream cheese, sour cream and salsa. Allow the cream cheese to melt and stir all ingredients together.
3. Drain pasta and add to meat. Stir in 1/4 cup cream.
4. Serve topped with cheese.

Two great things about this meal. 1. It only takes about 20 minutes to make. 2. It only uses two dishes! It is super yummy and made for great left overs for lunch the next day. And if you love your cheese (like the hubs and I both do) you can sprinkle some in when you add the pasta in addition to topping it off when served.
Oh, and yes, my new pan performed wonderfully! ;)
Friday, February 17, 2012
Chocolate - Chocolate Chip - Caramel Cake
If you have ever had my chocolate cake, then get ready for something even more amazingly delicious (yes, it actually is possible!). Years ago my mother-in-law introduced me to poke cakes. It turns an ordinary boxed cake into a gooey mess of cake goodness. Typically I bake a chocolate cake in a 9x13 pan, use a fork to poke holes all over it and cover it in icing. It's simple and for some reason so much better than just regular chocolate cake. So when I came across this recipe on Pinterest for a chocolate poke cake with added chocolate chips and caramel, naturally I couldn't resist!
Chocolate Chip-Caramel Poke Cake
Ingredients:
1 box Betty Crocker Super Moist Devil's Food Cake mix
11/3 cups buttermilk (I'm not a buttermilk fan and didn't feel like buying an entire carton just to throw the rest of it out, so naturally I just used the 2% that I had on hand)
1/2 cup vegetable oil
3 eggs
12oz semi-sweet chocolate chips
1 cup caramel topping (I used Smuckers caramel ice cream topping)
1/2 cup Betty Crocker Rich and Creamy vanilla frosting
Cooking Directions:
1. In a large bowl mix together cake mix, milk, eggs and oil with an electric mixer for 30 seconds at low speed and then on medium speed for 2 minutes.
2. Pour batter into a greased 9x13 pan. Sprinkle chocolate chips into and gently press into batter. Bake at 350* for 30-35 minutes until done.
3. Cool for 30 minutes. Using a fork poke holes all over cake. Pour caramel topping all over cake and allow to seep into holes. Cool completely, about 1 hour.
4. Microwave icing for about 30 seconds and stir until very soft. Spoon into a 1 quart resealable food bag. Cut the tip off one corner and drizzle all over cake.

Chocolate Chip-Caramel Poke Cake
Ingredients:
1 box Betty Crocker Super Moist Devil's Food Cake mix
11/3 cups buttermilk (I'm not a buttermilk fan and didn't feel like buying an entire carton just to throw the rest of it out, so naturally I just used the 2% that I had on hand)
1/2 cup vegetable oil
3 eggs
12oz semi-sweet chocolate chips
1 cup caramel topping (I used Smuckers caramel ice cream topping)
1/2 cup Betty Crocker Rich and Creamy vanilla frosting
Cooking Directions:
1. In a large bowl mix together cake mix, milk, eggs and oil with an electric mixer for 30 seconds at low speed and then on medium speed for 2 minutes.
2. Pour batter into a greased 9x13 pan. Sprinkle chocolate chips into and gently press into batter. Bake at 350* for 30-35 minutes until done.
3. Cool for 30 minutes. Using a fork poke holes all over cake. Pour caramel topping all over cake and allow to seep into holes. Cool completely, about 1 hour.
4. Microwave icing for about 30 seconds and stir until very soft. Spoon into a 1 quart resealable food bag. Cut the tip off one corner and drizzle all over cake.

(photo credit: Betty Crocker)
(As amazing as this combination is, next time I'm going to try milk chocolate chips instead of semi-sweet. The semi-sweet is just a little too bitter for my taste.)
Cut yourself a nice big piece, microwave it for about 10 seconds and top with a heaping scoop of vanilla ice-cream and you have heaven in a bowl!
Make it and devour it. Trust me, you're going to love it (unless you are one of those crazy people that doesn't believe in eating chocolate. how do you people even exist?!).
Friday, February 10, 2012
Mustard Baked Tilapia
Chicken. Chicken. Chicken. I know that by now most of you are probably asking, "Does she ever cook supper with something besides chicken (and the occasional ground beef in a crock pot)?" Truth is, ashamedly, no, not really. So this week I was on a mission to make something for dinner that didn't have ANY chicken in it! Plus, now that we live in Louisiana I'm supposed to become a seafood lover (yeah, good luck with that happening any time soon). There is one fish that I don't mind consuming every now and then that doesn't have much of that "fishy" taste: tilapia.
So I reached into the freezer, past the chicken, and grabbed two tilapia fillets I had picked up at the grocery store earlier in the week. Now what? If I was going to eat fish I didn't want it bland and tasting like, well, fish. So I rummaged through the refrigerator and here is what came of it:
Mustard Baked Tilapia
Ingredients:
2 tilapia fillets
2 tablespoons spicy mustard
4 tablespoons bread crumbs
Cooking Directions:
1. Coat fillets in spicy mustard (I found it easiest to use a knife to spread it). Sprinkle bread crumbs on both sides of the fillets.
2. Place in a baking dish and bake in oven at 350* for 15 minutes.
Sorry that I didn't get a picture but the hubs gobbled his up too quick (and well, I was starving!). The fish came out very juicy and flavorful. The mustard did the trick and covered up any "fishy" taste. I served green beans and pan-fried potatoes as well, so I guess you can say we had a healthy version of "fish and chips". And the whole meal took only 30 minutes. Which was perfect since we had both worked long days and were super hungry by the time that we got home.
So... voila! I can cook supper without chicken! But don't laugh at me when my next recipe is a chicken casserole. It's one I've been wanting to try for weeks. ;)
Sunday, January 29, 2012
Oreo Truffles
I saw this recipe on Pinterest a while ago and am finally getting around to trying it out. I was so excited because it only has 3 ingredients and 1 of them is my favorite cookie - Oreos!!
The whole process from pantry to mouth took about 30 minutes (because of freezer/setting time).
No Bake Oreo Truffles
Ingredients:
1 package Oreo cookies
8oz cream cheese, softened
1 package baking chocolate/candy coating
Cooking Directions:
1. Finely chop Oreos in a food processor or blender. Set some aside for a garnish later.
2. Mix cream cheese and Oreos (you may not need to use all of your cream cheese. start with about half and continue adding in until you reach a doughy consistency) and roll into bite-size balls. Place on a cookie sheet covered with wax paper and put in freezer for 15 minutes.
3. While truffles are chilling, melt chocolate in a small bowl.
4. Once truffles have chilled, one at a time dip them in the chocolate and return to cookie sheet and sprinkle with the Oreo crumbs you set aside earlier.
5. Let chill and devour!

The whole process from pantry to mouth took about 30 minutes (because of freezer/setting time).
No Bake Oreo Truffles
Ingredients:
1 package Oreo cookies
8oz cream cheese, softened
1 package baking chocolate/candy coating
Cooking Directions:
1. Finely chop Oreos in a food processor or blender. Set some aside for a garnish later.
2. Mix cream cheese and Oreos (you may not need to use all of your cream cheese. start with about half and continue adding in until you reach a doughy consistency) and roll into bite-size balls. Place on a cookie sheet covered with wax paper and put in freezer for 15 minutes.
3. While truffles are chilling, melt chocolate in a small bowl.
4. Once truffles have chilled, one at a time dip them in the chocolate and return to cookie sheet and sprinkle with the Oreo crumbs you set aside earlier.
5. Let chill and devour!

(photo credit: Chef in Training)
I ended up only using half of the package of Oreos and only about 3oz of the cream cheese dipped in 1/3 of the melted candy coating (which made 15 truffles). But after tasting them, I just might have to make the other half of the package!
The best way to describe the taste of these is that they taste just like Oreos dunked in milk. They have a gooey texture and are completely delicious. Good thing, each one is pretty filling so you won't want to eat too many at once, which just leaves more for later!
Make these. Love them. And remember them the next time you have a party or get together, they'd be perfect!
Subscribe to:
Posts (Atom)